
worm composting
If you’re an environmentally conscious gardener or simply looking for a way to reduce waste while enriching your soil, worm composting is a fantastic solution. Also known as vermicomposting, this eco-friendly practice utilizes worms to break down organic matter, turning it into nutrient-rich compost. In this article, we’ll guide you through the process of creating your worm composting system and reaping the benefits of nature’s recycling system.
1. What is Worm Composting?
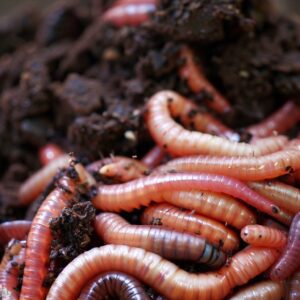
Worm composting is a process that utilizes earthworms to convert organic waste into nutrient-rich compost. These red wiggler worms (Eisenia fetida) are voracious eaters, consuming kitchen scraps, paper, cardboard, and other decomposable materials. As the worms digest this organic matter, they release castings—a potent form of compost that benefits plants and soil health.
2. Why Choose Worm Composting?
Worm composting offers numerous advantages over traditional composting methods. First, it allows you to recycle kitchen waste and reduce your ecological footprint. Additionally, worm composting creates a superior soil conditioner, rich in essential nutrients and beneficial microorganisms that promote plant growth. It’s a space-saving, odorless, and efficient process, making it an ideal composting solution for urban dwellers and gardeners alike.
3. Setting Up Your Worm Composting Bin
Selecting the Right Worms
For successful worm composting, red wiggler worms are the preferred choice. These worms are well-adapted to the composting process, thriving in organic waste-rich environments.
Gather materials:
You will need a container (plastic bin, wooden box), bedding material (shredded newspaper, cardboard, coconut coir), composting worms (Red Wigglers), and organic matter (fruit and vegetable scraps, coffee grounds).
Prepare the Bedding
Soak the bedding material in water until it is damp, then place it in the bottom of the container.
Add the composting worms: Sprinkle the worms on top of the bedding.
Providing Proper Ventilation
Good airflow is essential for worm composting. You can drill small holes in the bin’s sides and bottom to ensure proper ventilation.
Finding the Ideal Location
Place your worm composting bin in a cool, shaded area away from direct sunlight and extreme temperatures. A basement, garage, or even under the sink can be suitable spots.
4. Feeding Your Worms
Add food:
Start feeding the worms small amounts of food (fruit and vegetable scraps, coffee grounds, etc.) and mixing it into the bedding.
Suitable Foods for Worms
Worms thrive on various kitchen scraps, including fruit and vegetable peels, coffee grounds, tea bags, and crushed eggshells. These are rich sources of nitrogen, which worms need for their composting process.
Foods to Avoid
Certain foods can harm your worm composting system.
Feeding Schedule
Establish a feeding routine, adding small amounts of food regularly. Observe the worms’ consumption and avoid overfeeding, which can lead to excess moisture and undesirable conditions.
5. Maintaining the Worm Composting System
Regular Check-ups
Regularly inspect your worm composting bin for any issues or imbalances. Ensure the bedding remains moist but not soggy, and remove any undigested food.
Troubleshooting Common Issues
Common problems in worm composting include foul odors, fruit flies, and worm escape attempts. We provide solutions to these issues in our troubleshooting guide.
6. Harvesting and Using Worm Compost
Harvesting the Compost
After several months, your worm compost will be ready for harvest. To separate the worms from the compost, you can utilize different approaches, including exposing them to light or employing migration techniques.
Applying the Compost in Your Garden
Worm compost is a nutrient-dense fertilizer. Apply it to your garden soil or mix it with potting mix to enhance plant growth, soil structure, and water retention.
7. The Environmental Benefits of Worm Composting
Worm composting significantly reduces waste that would otherwise end up in landfills, producing harmful greenhouse gases. By participating in this sustainable practice, you play a vital role in protecting the environment.
8. Worm Composting Tips and Tricks
Avoiding Overfeeding
Overfeeding your worms can lead to excess waste and unwanted smells. Stick to the recommended feeding schedule to maintain a balanced composting process.
Maintain moisture:
Keep the bedding moist but not wet. You can add water as needed.
Introducing Beneficial Microorganisms
Enhance your worm compost by introducing beneficial microorganisms that aid in breaking down organic matter and enriching the compost.
Ventilate:
Ensure that the container has adequate air flow. You can drill holes in the lid or sides of the container for this purpose.
Wait: In about 2-3 months, the worms will have broken down the organic matter into vermicompost. At this point, you can separate the compost from the worms and use it in your garden.
Repeat the process with a new container, bedding, and food when the original bin is full.
9. Frequently Asked Questions (FAQs)
- Q: Can I use regular garden worms for composting? A: No, regular garden worms are not suitable for composting. Red wiggler worms are best for this purpose.
- Q: How much space do I need for a worm composting bin? A: Worm composting bins come in various sizes to suit different needs. Consider the amount of waste you generate to determine the bin size.
- Q: What if my compost smells bad? A: Foul odors may indicate overfeeding or improper ventilation. Adjust your feeding and ensure proper airflow in the bin.
- Q: Can I use worm compost for indoor plants? A: Yes, worm compost is excellent for indoor plants as it provides essential nutrients and improves soil structure.
- Q: How often should I harvest the compost? A: Harvest worm compost every few months, once the bedding material has been mostly transformed into rich vermicompost.
Conclusion
Worm composting is a rewarding and eco-friendly way to reduce waste while creating nutrient-rich compost for your garden. By following the steps outlined in this guide, you’ll be well on your way to becoming a successful vermicomposter. Embrace this sustainable practice and witness the positive impact it has on your plants, soil, and the environment as a whole.
